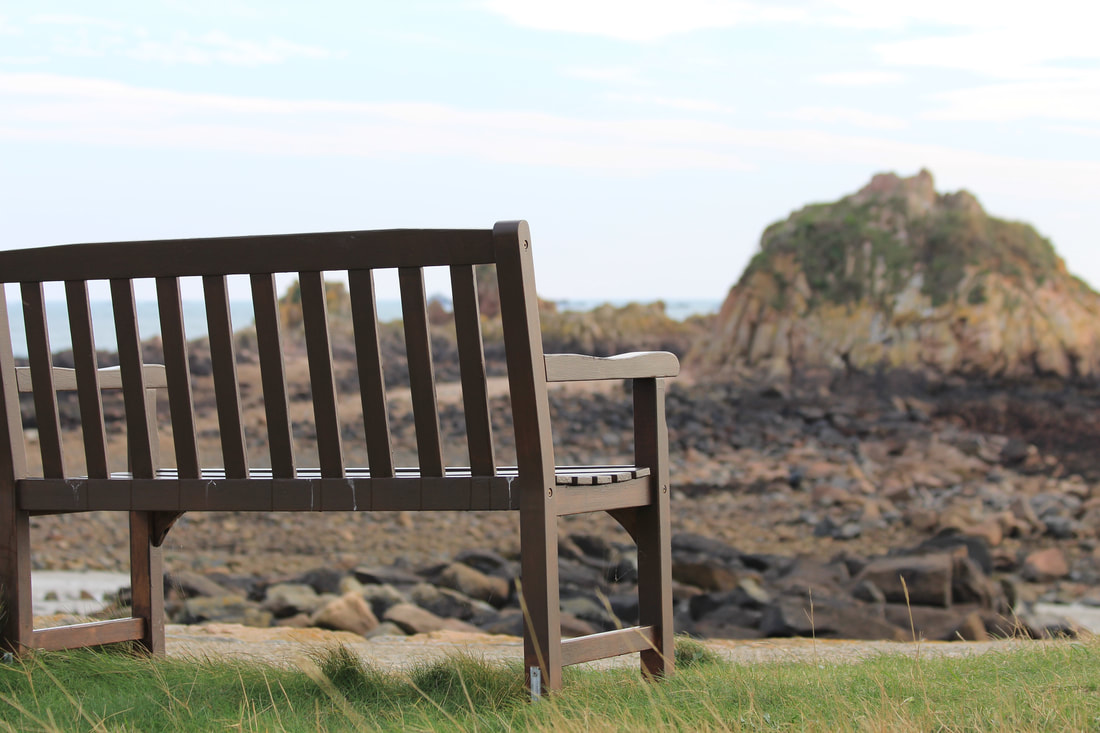
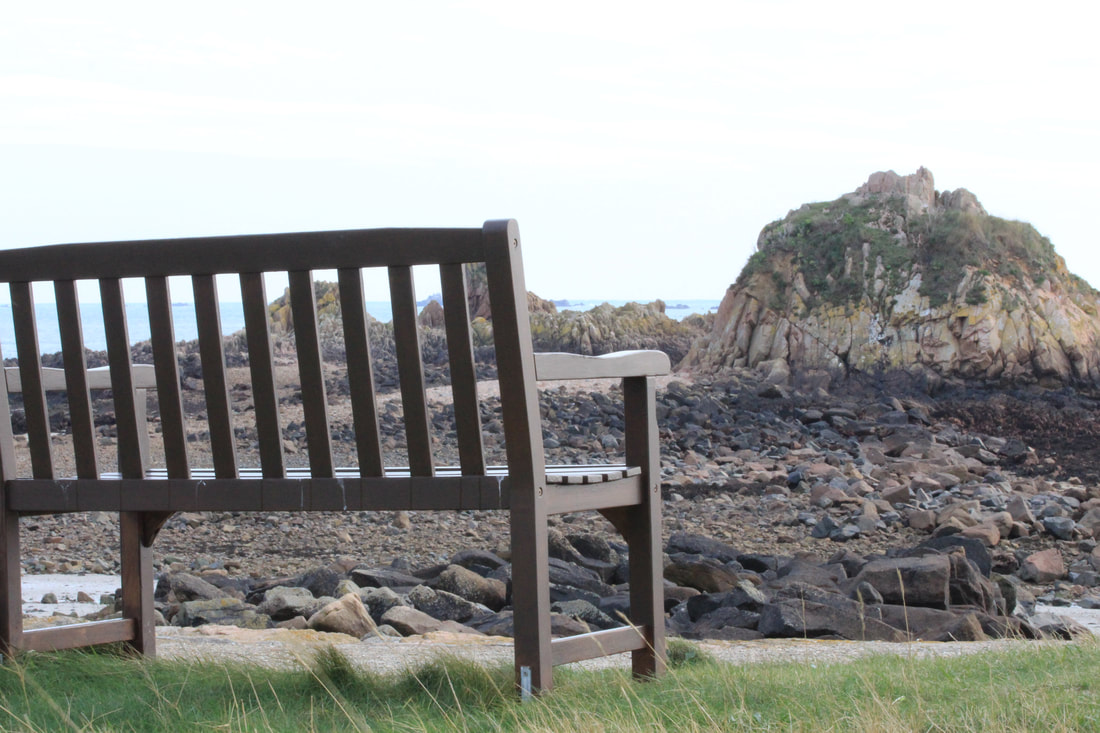
Find a subject in front of a background with depth. Take a very close viewpoint and zoom in. Focus on the subject and take a single shot. Then, without changing the focal length or framing, set your focus to infinity and take a second shot.
Experimenting
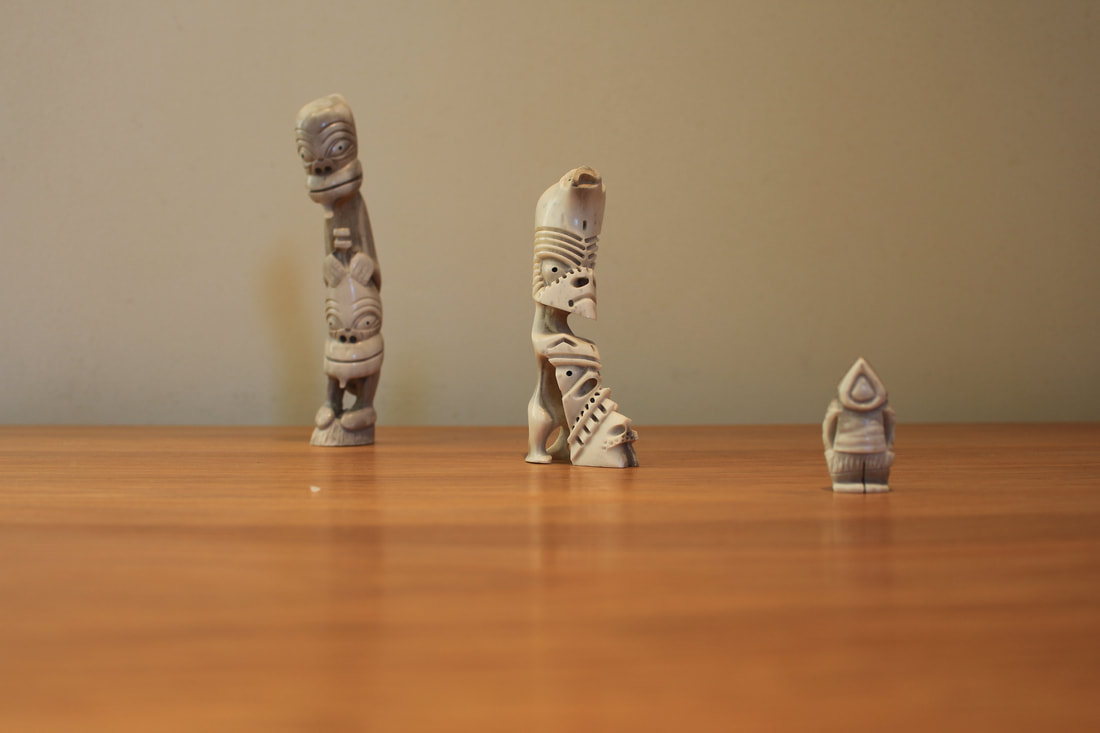
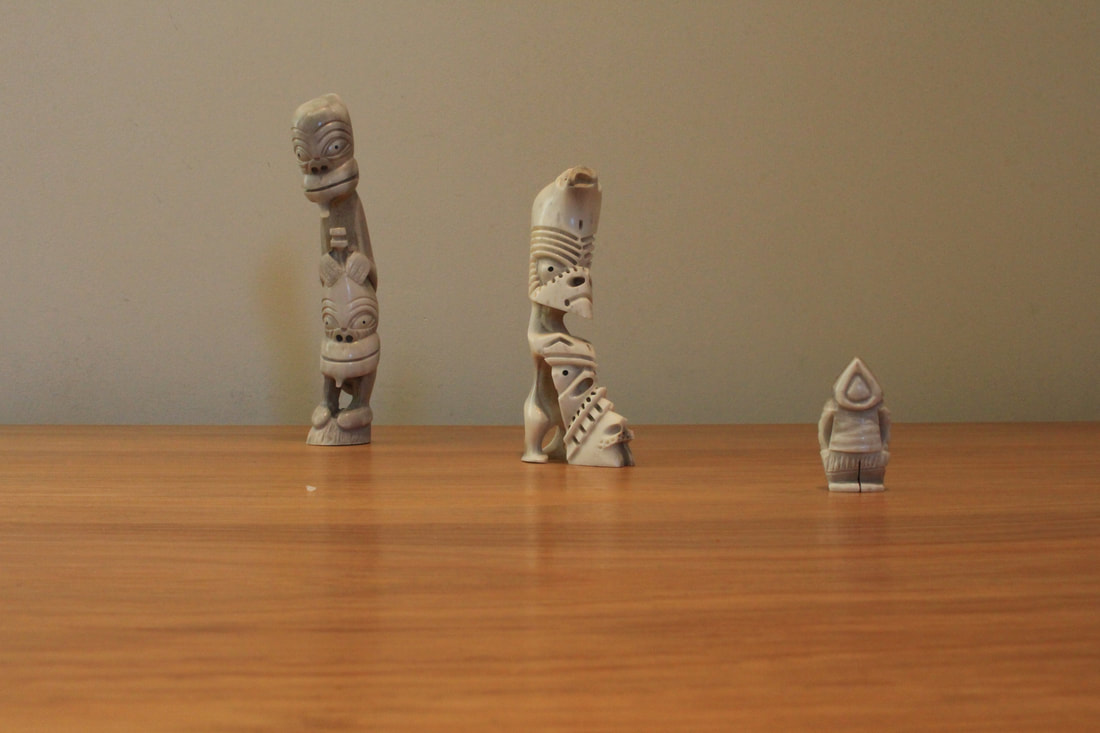
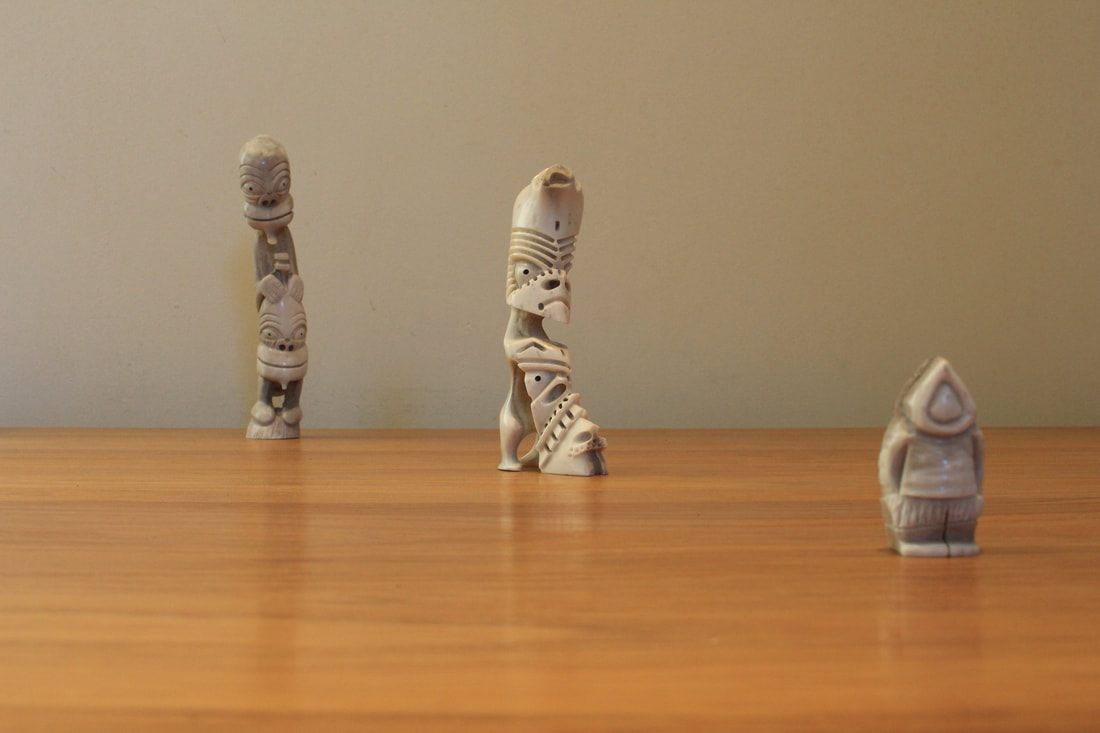
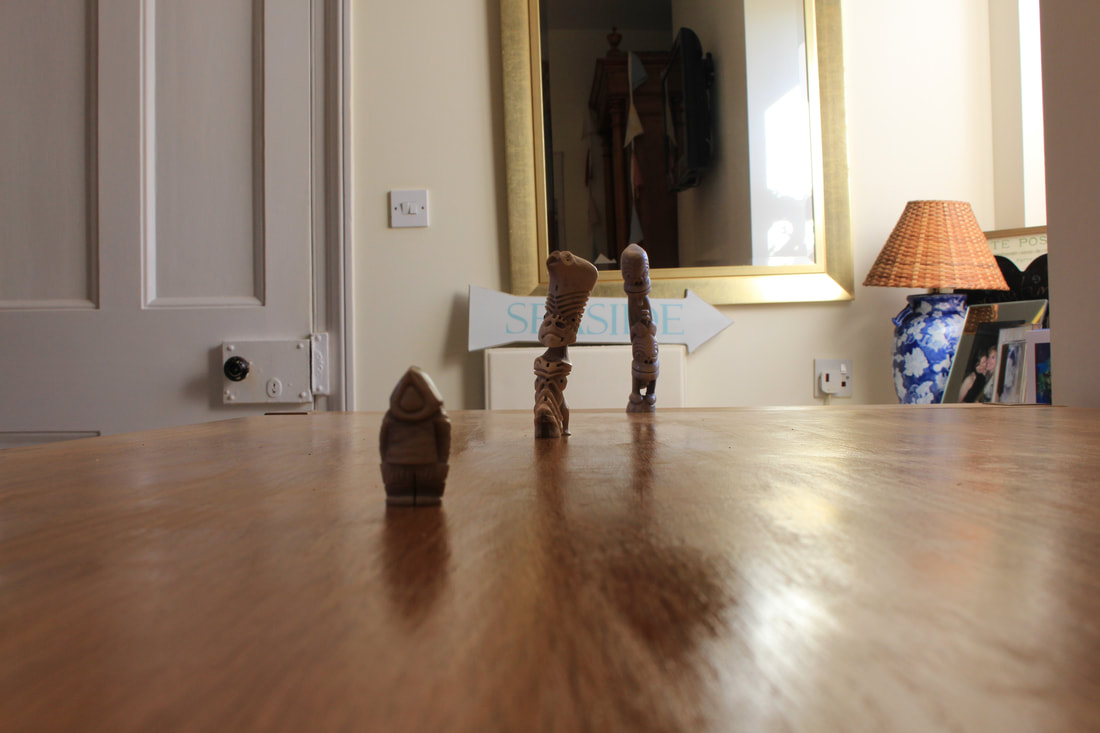
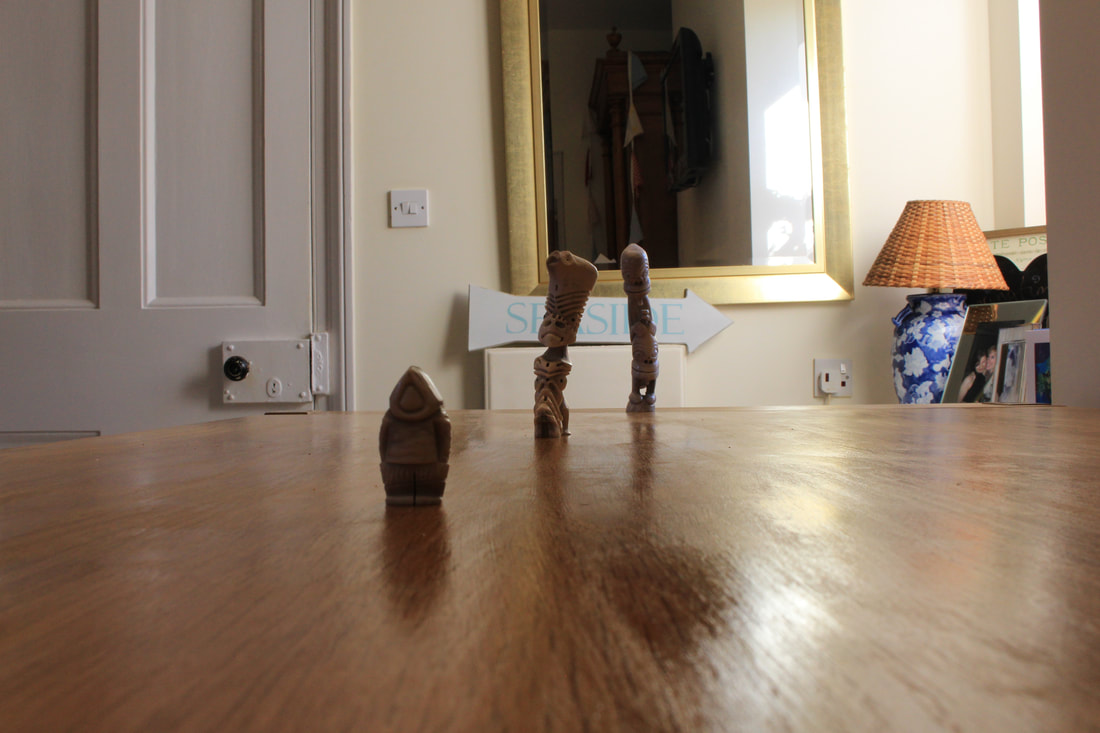
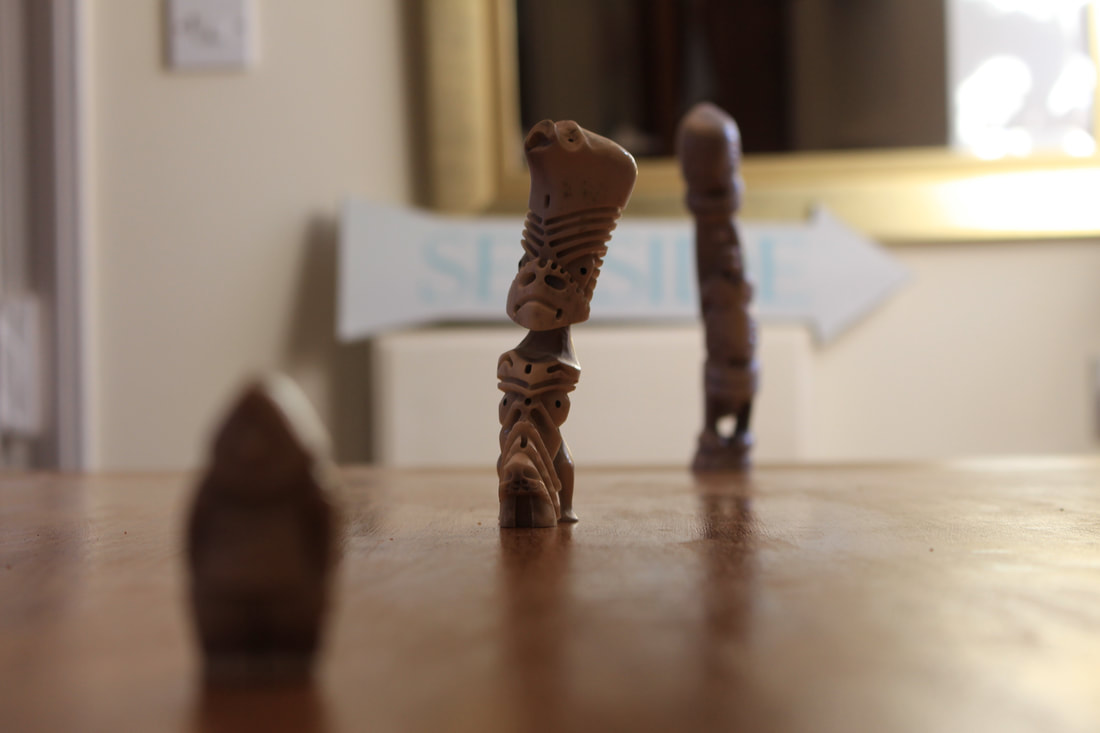
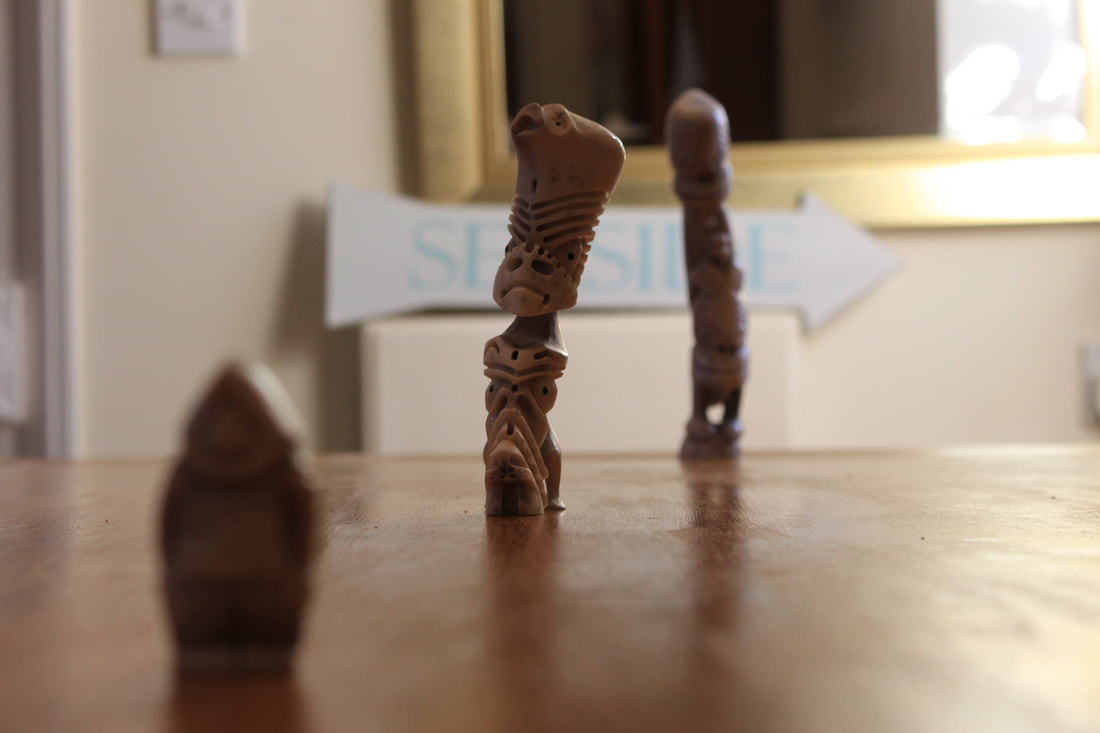
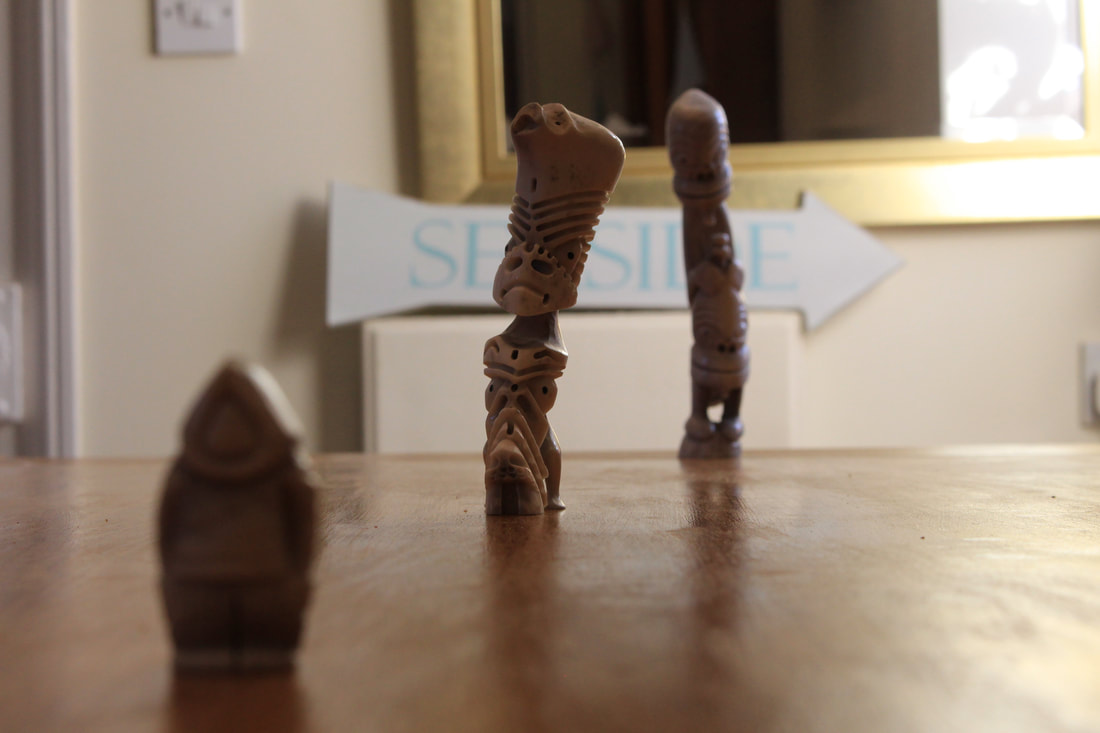
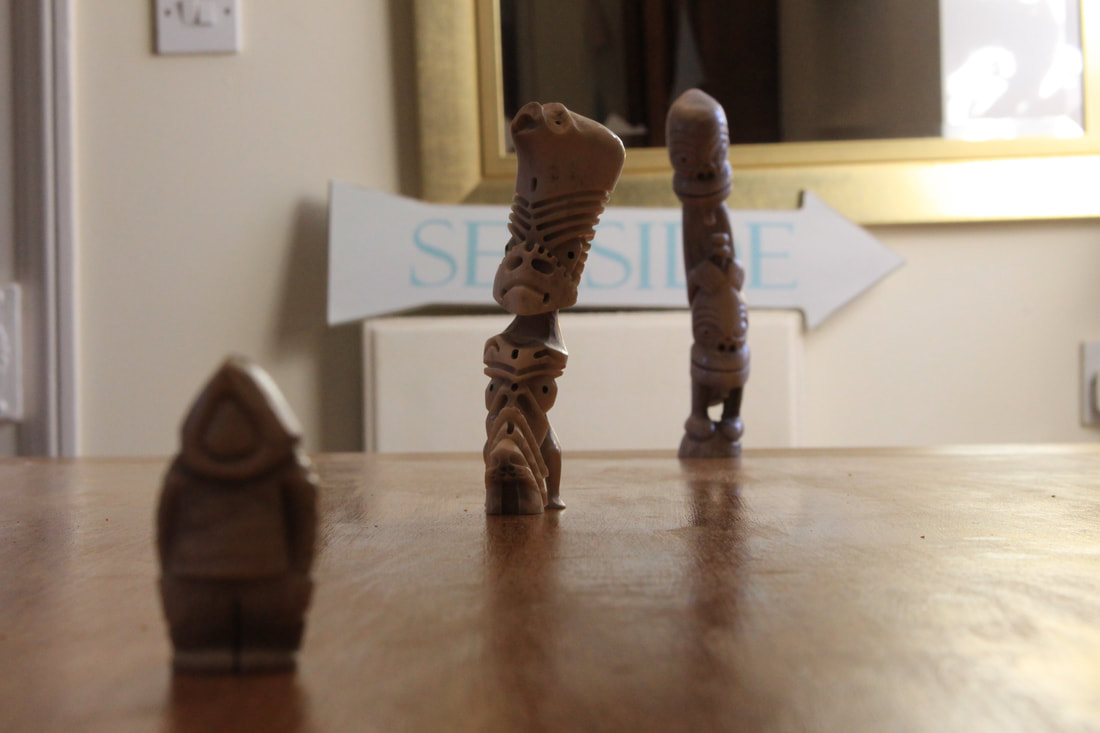
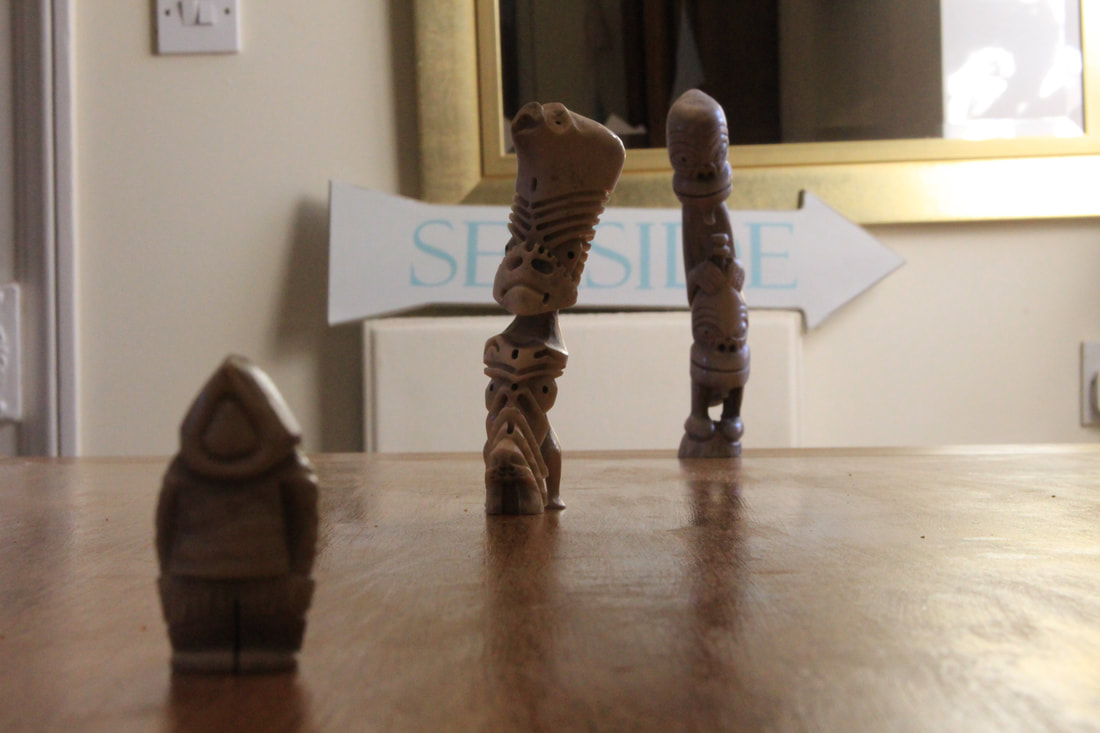
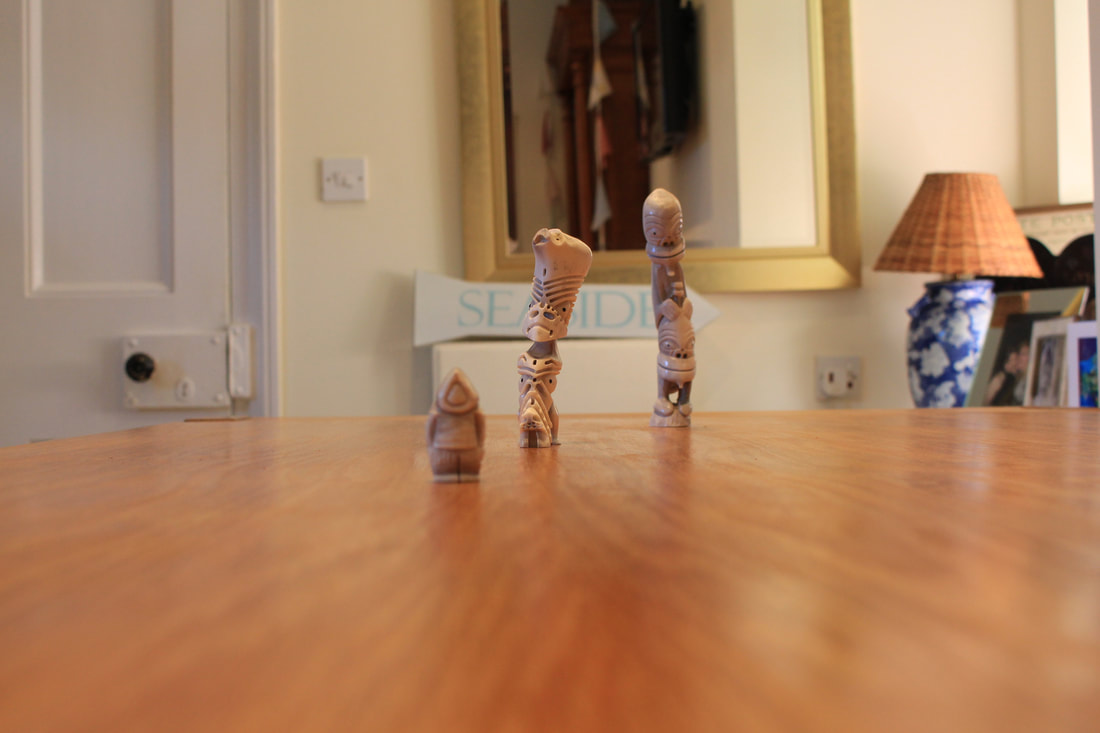
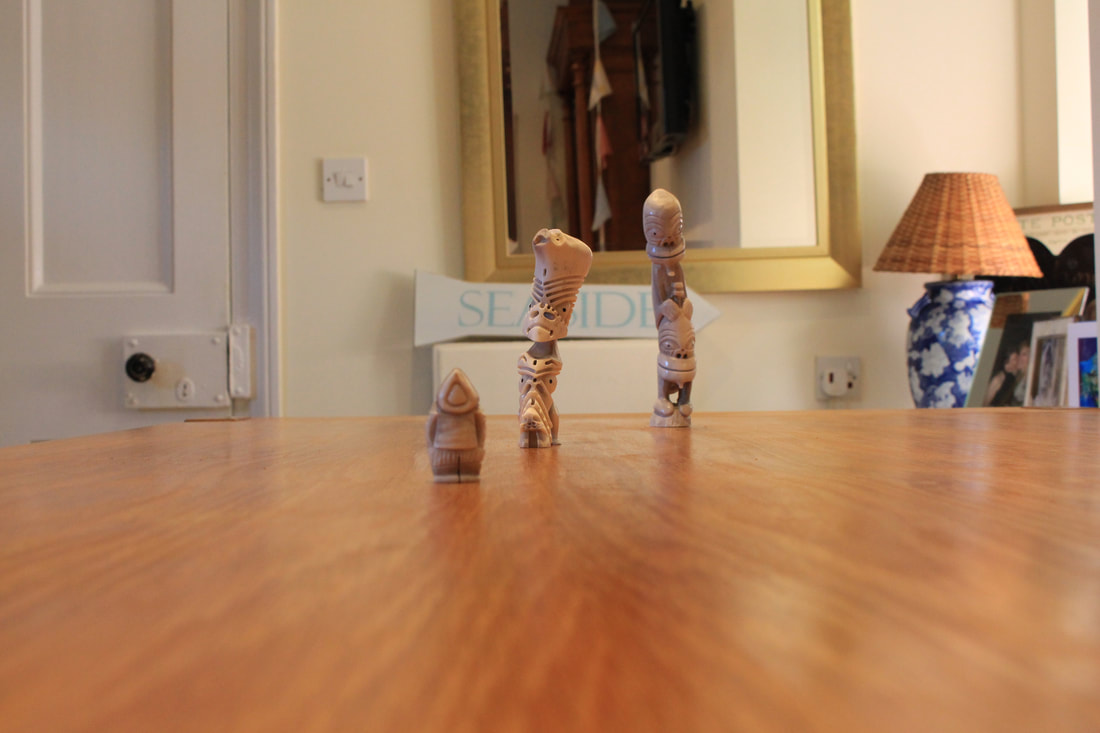
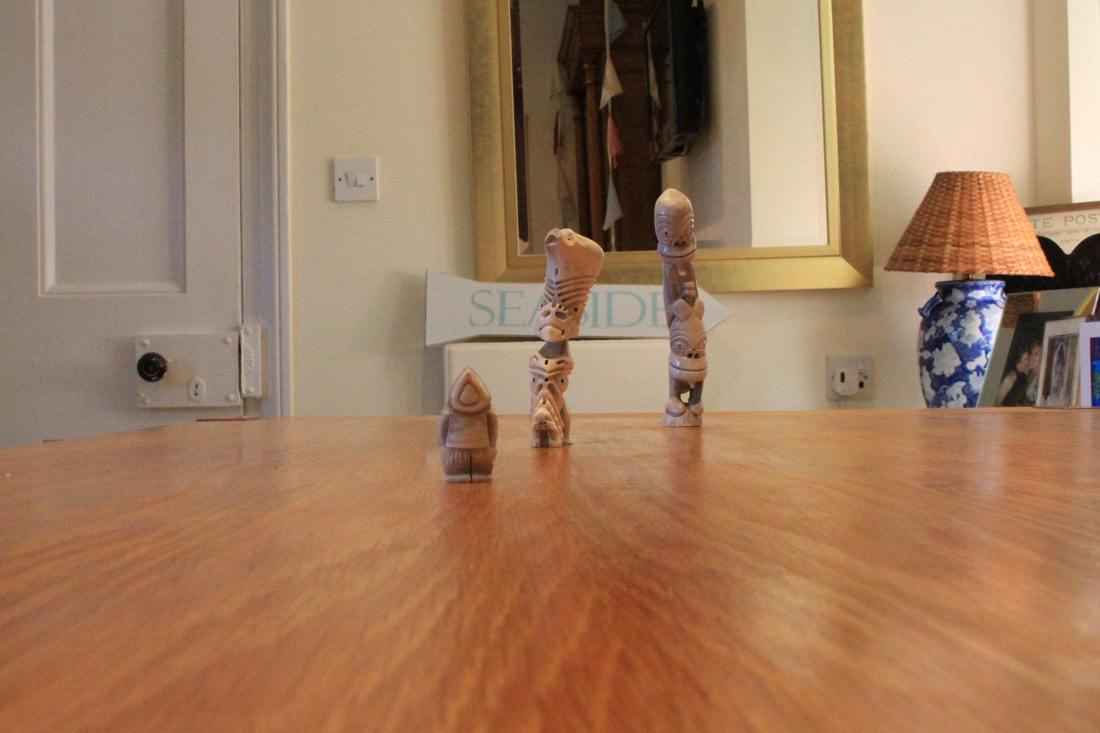
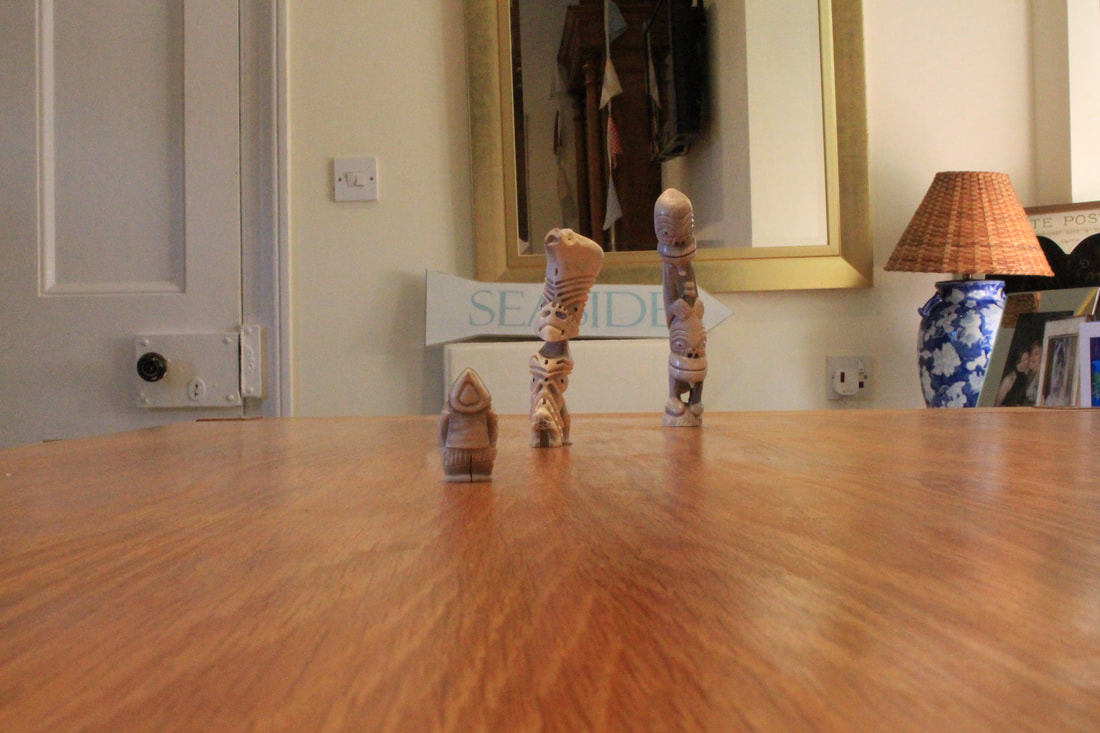
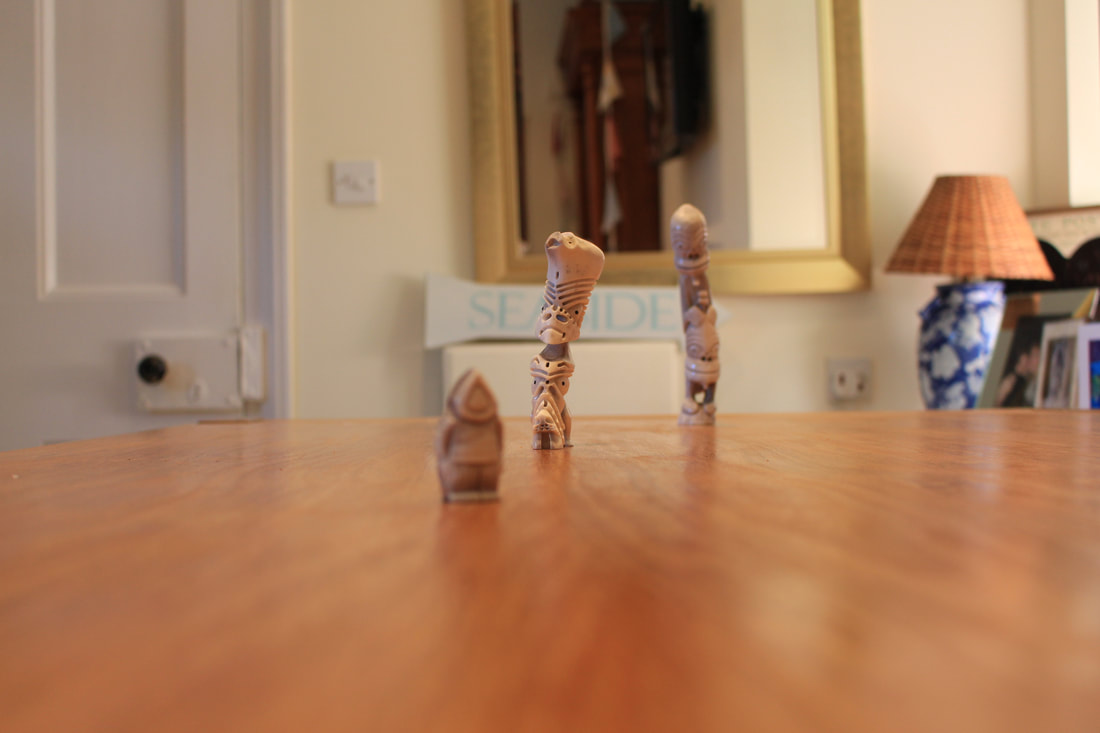
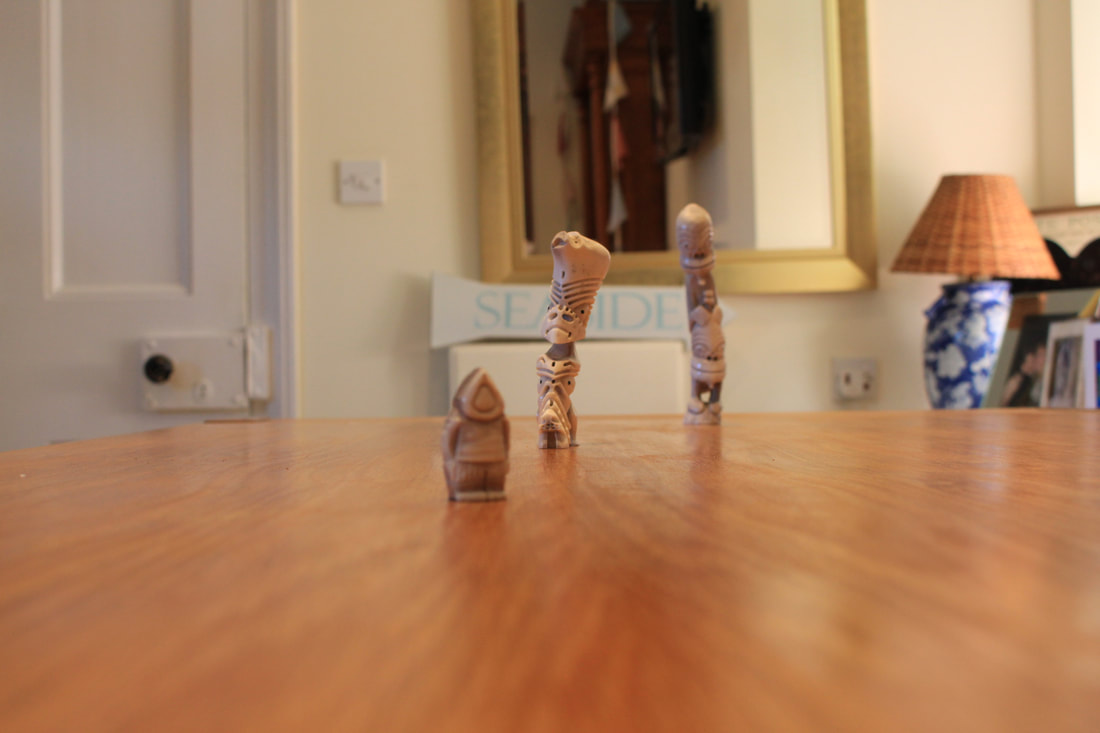
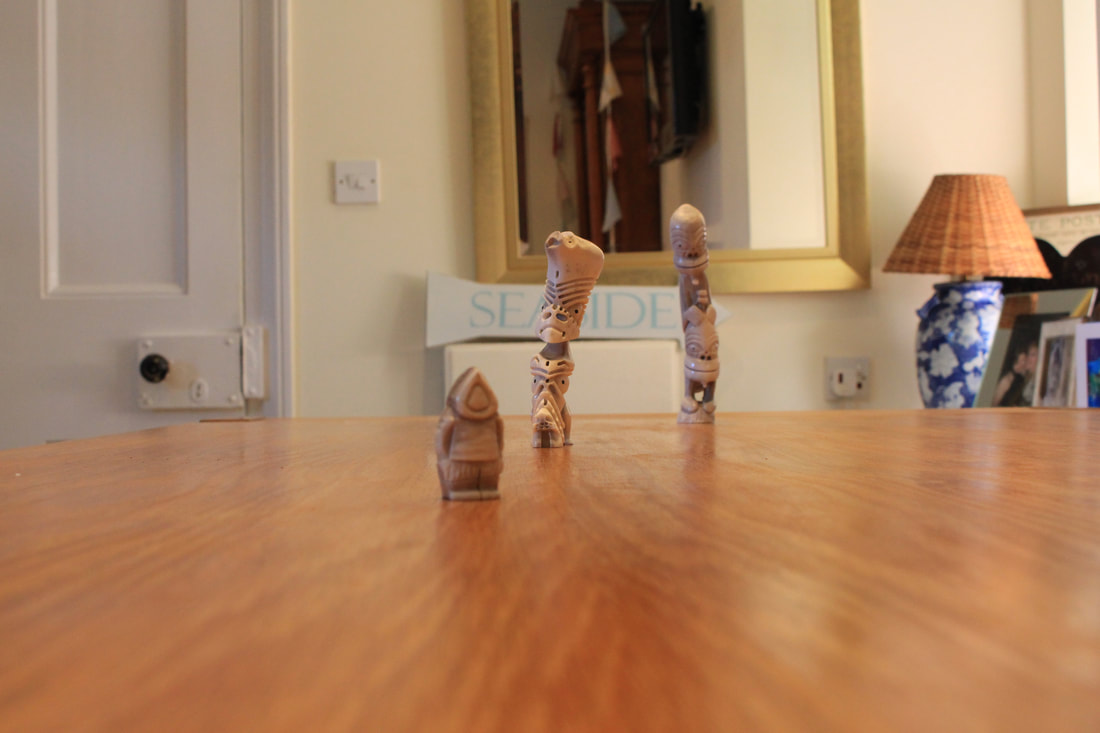
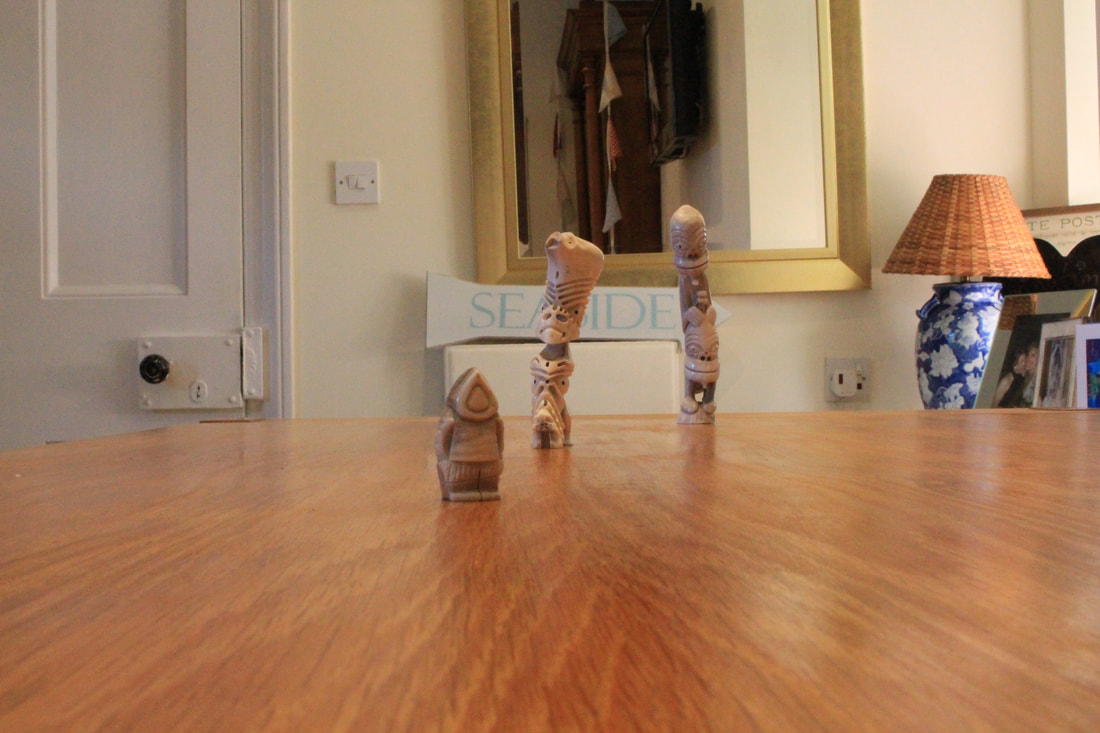
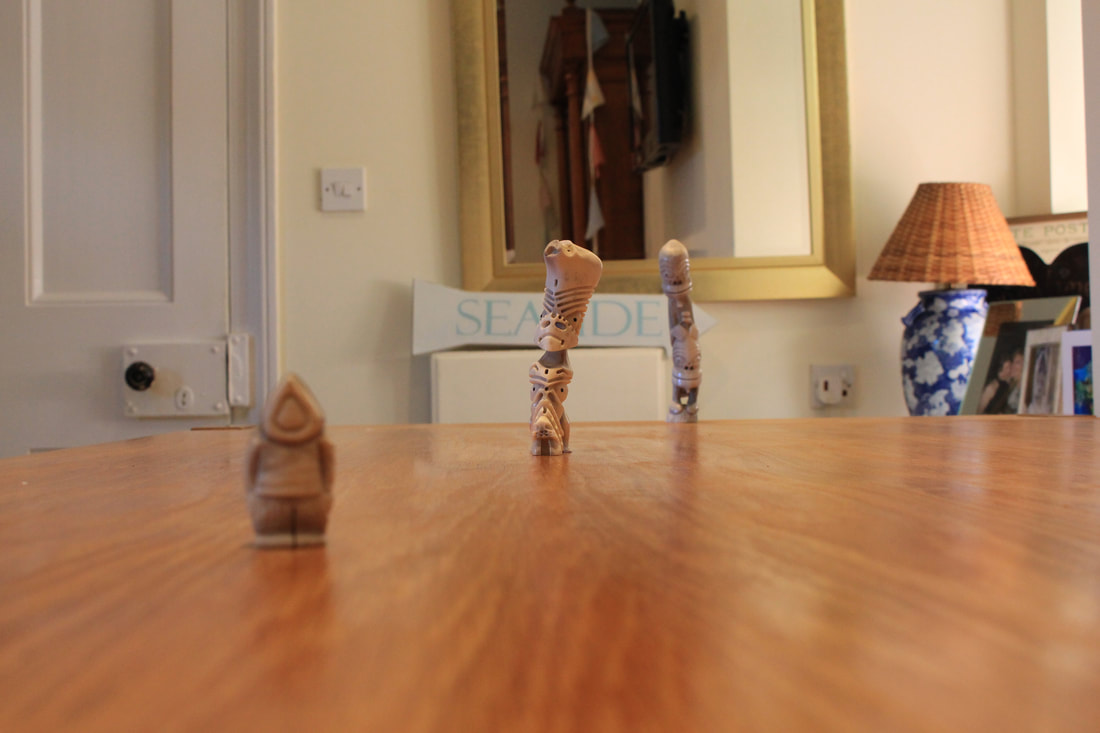
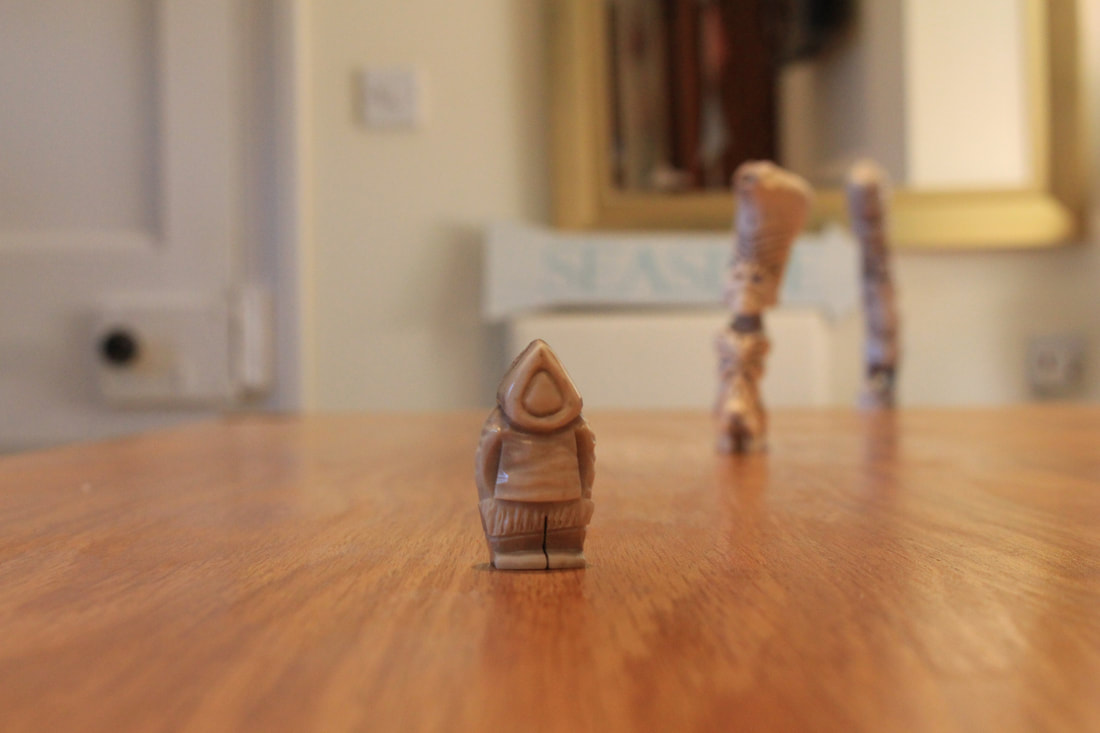
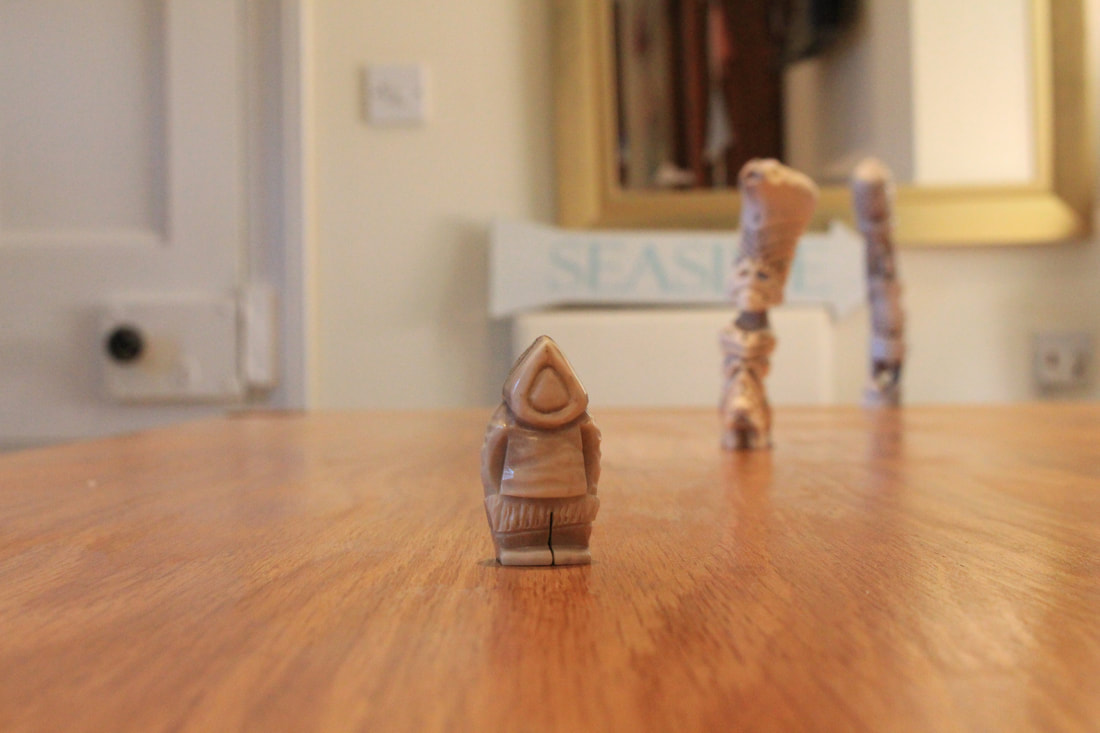
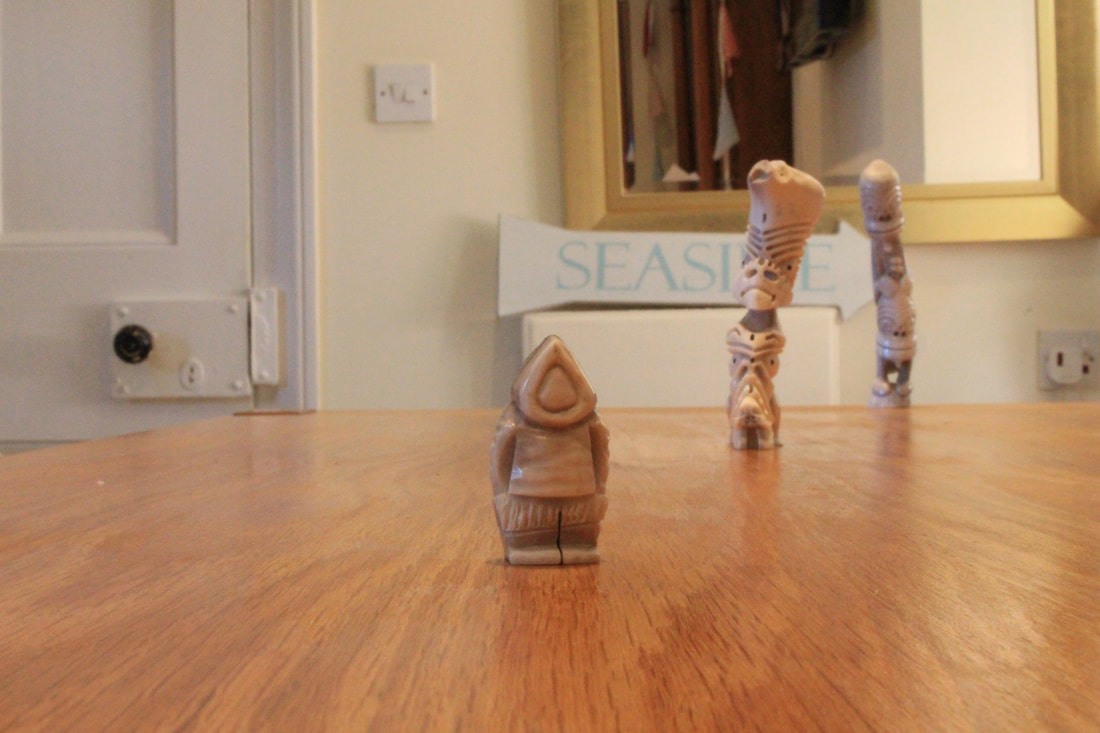
When starting Section 2, I decided to follow the footsteps of someone I had heard about, who when learning how his camera worked, took the same photo many times, but on each occasion with a different setting, so that he could see and understand the impact each change had. When researching aperture, I came across the website of Photography Hero (https://photographyhero.com/beginners-guide-understanding-aperture/) which when explaining the concept of aperture, used an image of three items lined up at slightly different depths. I decided to recreate the image and take a photo at each f stop option my camera allowed.
I quickly discovered my camera allowed third stop increments in f-stops, which allowed for many photos to be taken. For ease below I have only shown the images increasing by one stop.
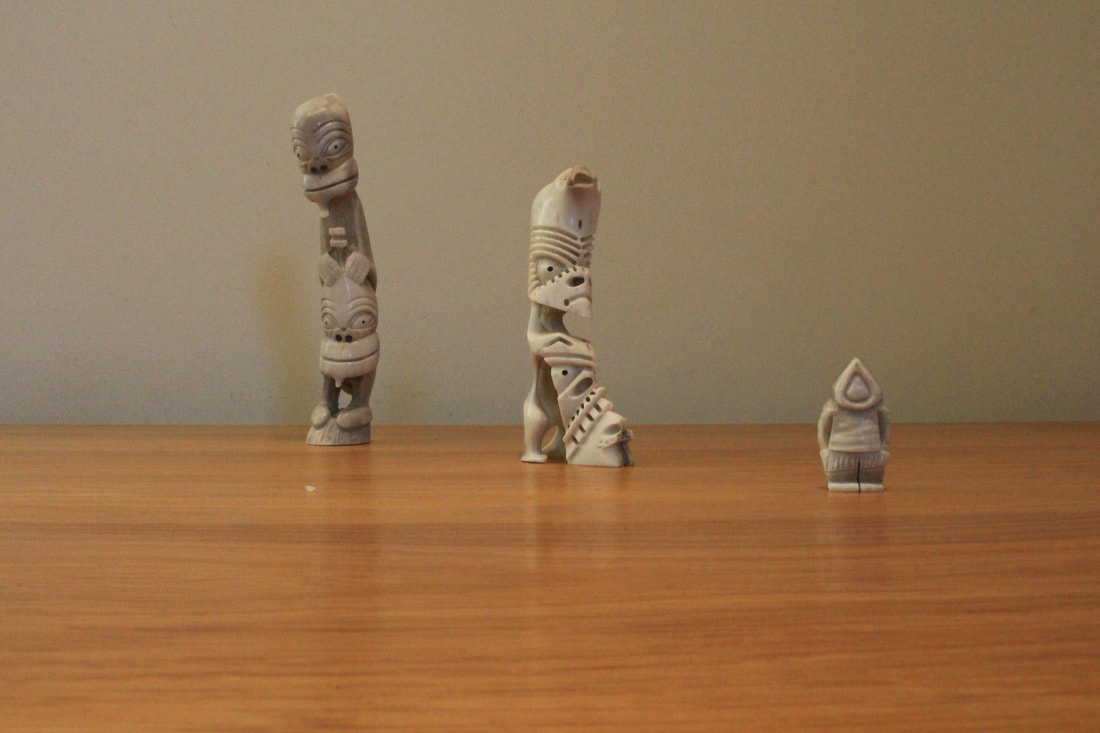
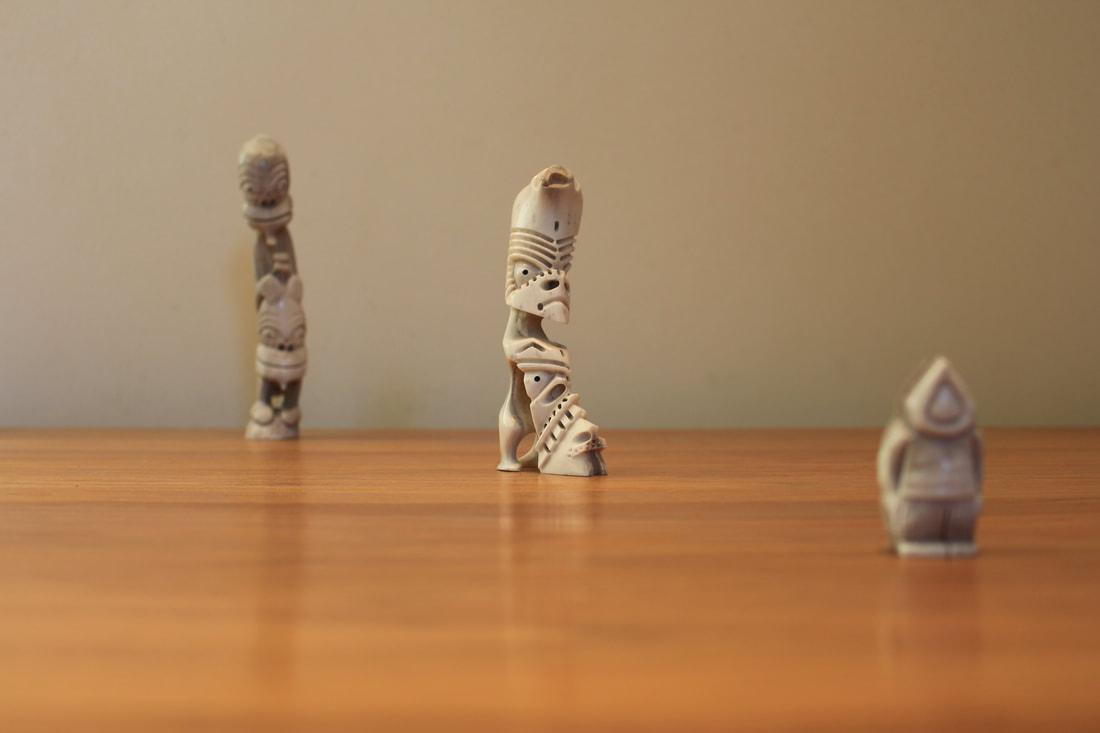
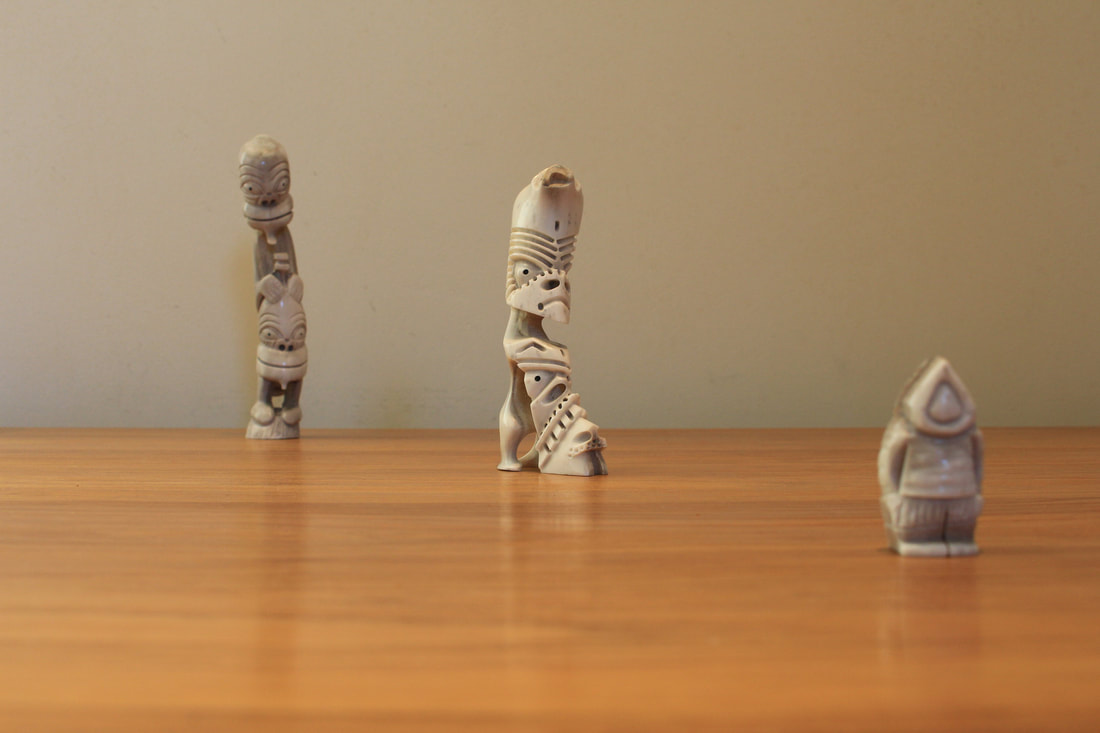
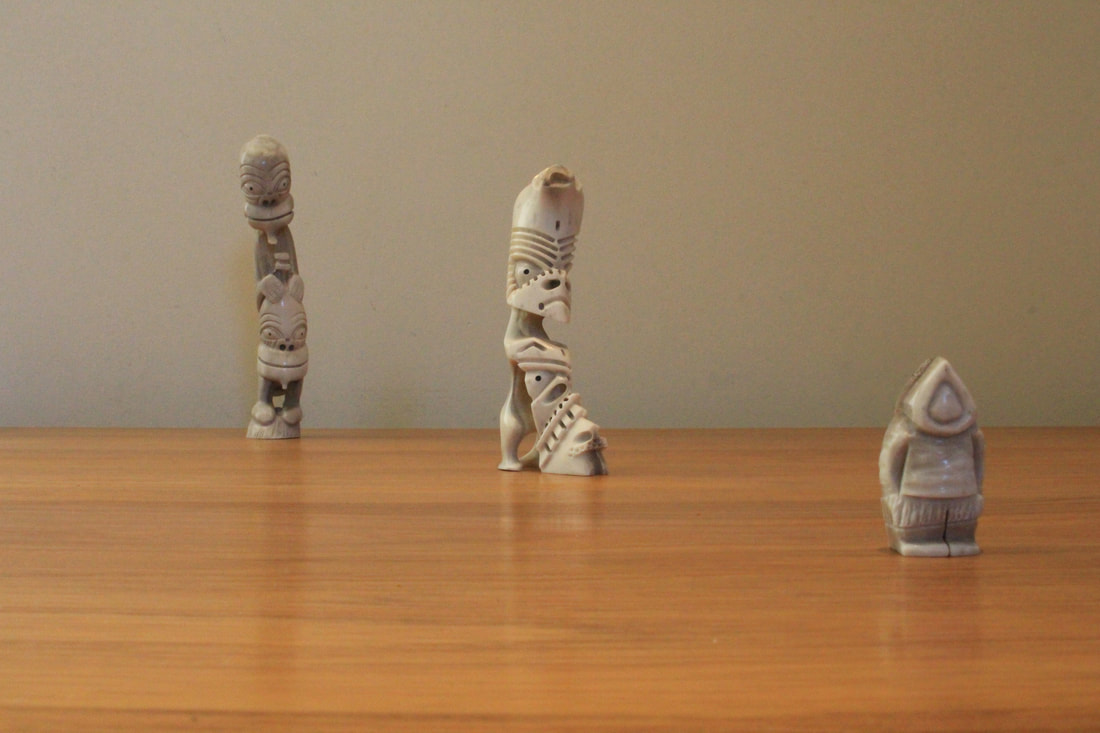
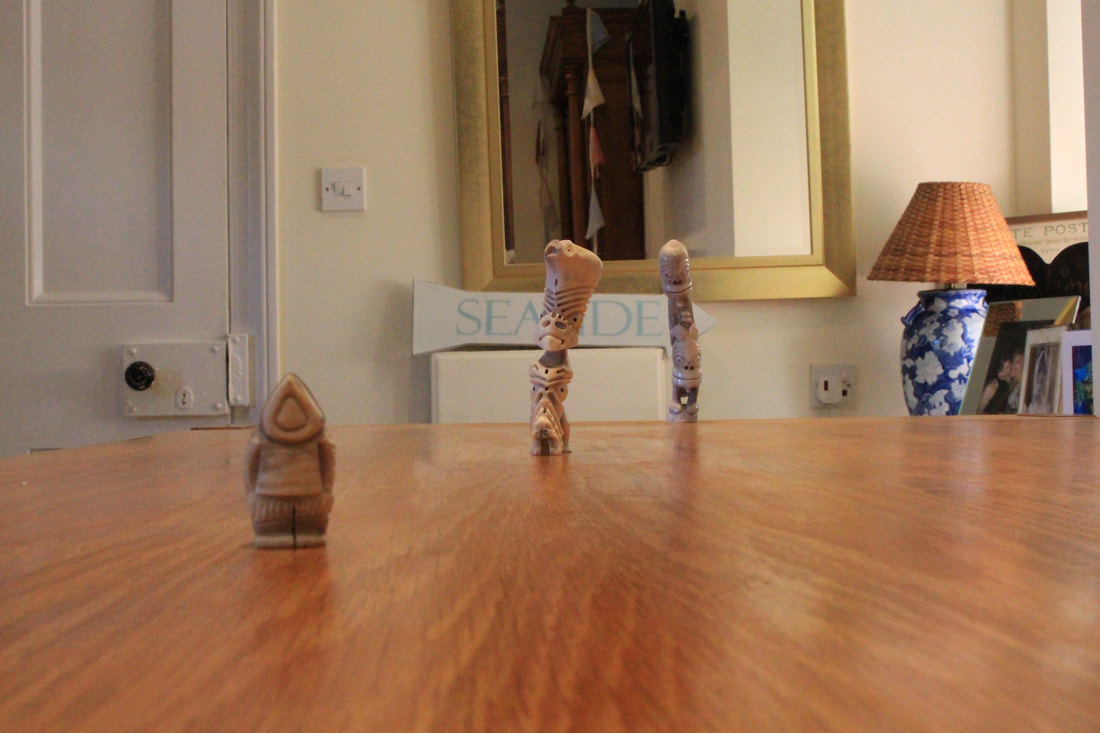
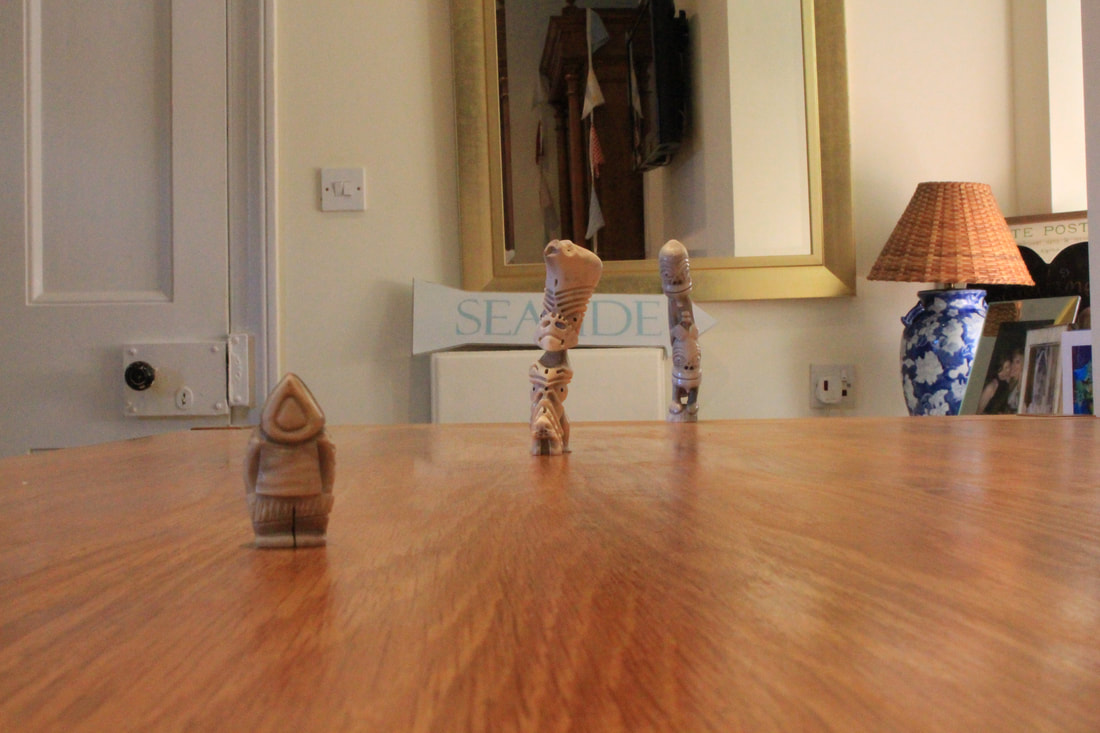
Experiment 1
|
f stop: f/4
Exposure: 1/40 ISO: 160 Focal length: 21 |
|
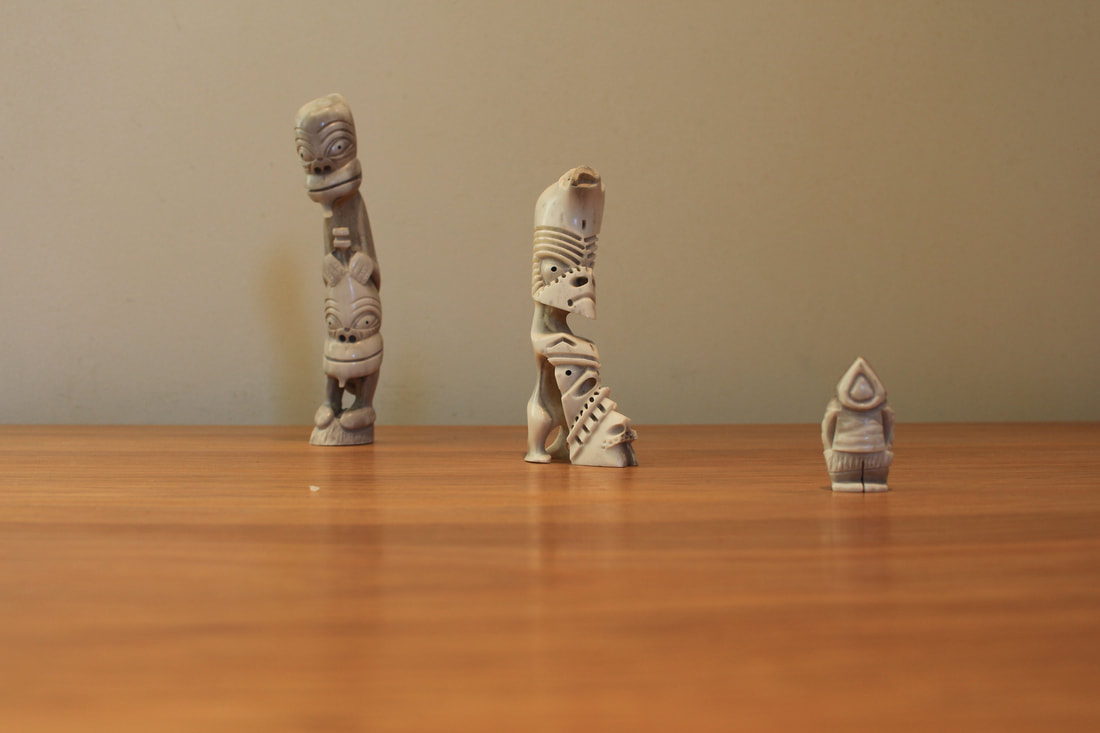
f stop: f/5.6
Exposure: 1/40 ISO: 320 Focal length: 21 |
|
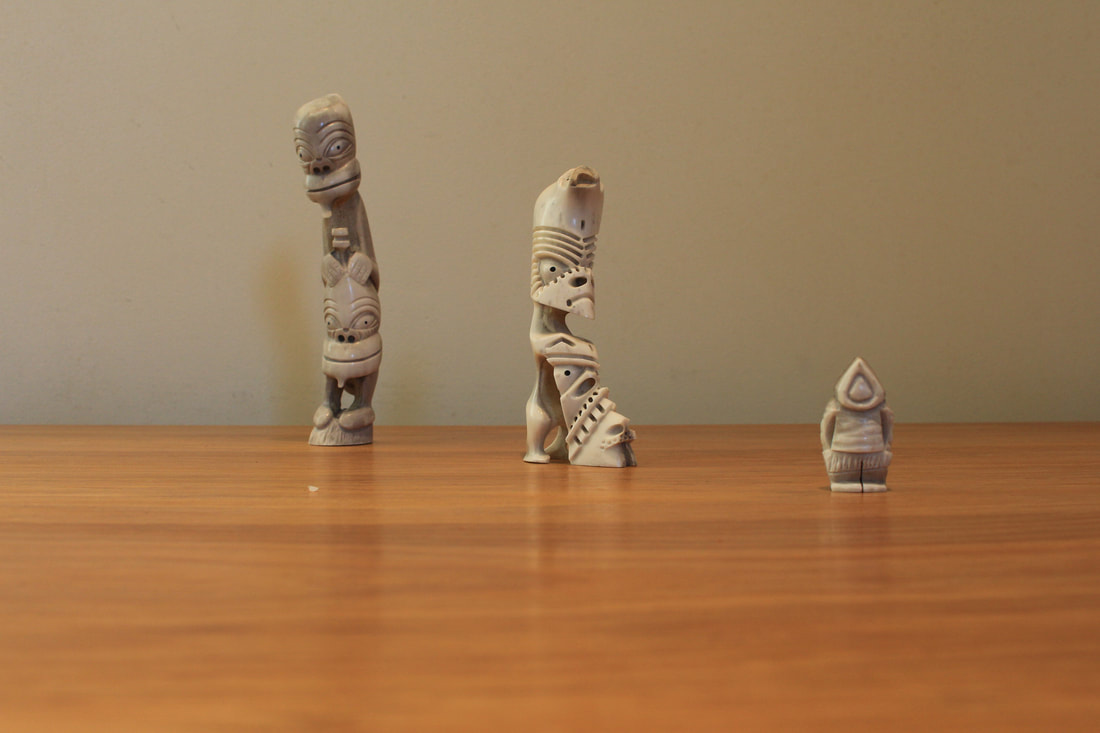
f stop: f/8
Exposure: 1/40 ISO: 640 Focal length: 21 |
|
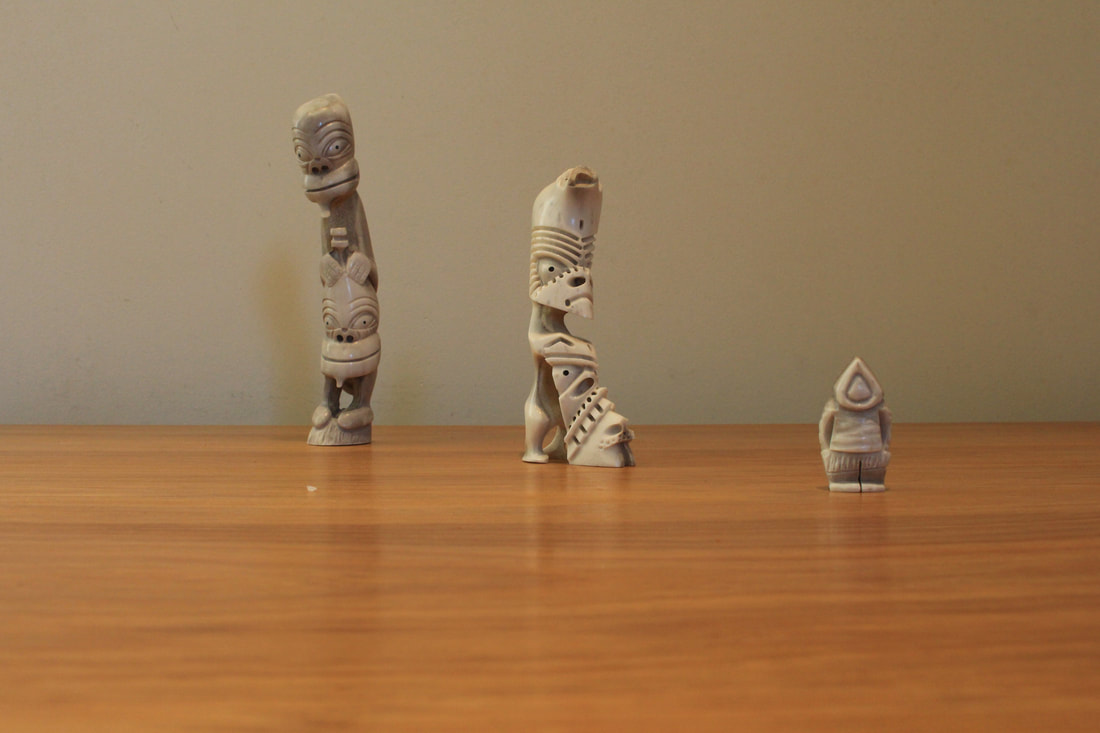
f stop: f/11
Exposure: 1/40 ISO: 1250 Focal length: 21 |
|
f stop: f/16
Exposure: 1/40 ISO: 2500 Focal length: 21 |
|
f stop: f/22
Exposure: 1/40 ISO: 5000 Focal length: 21 |
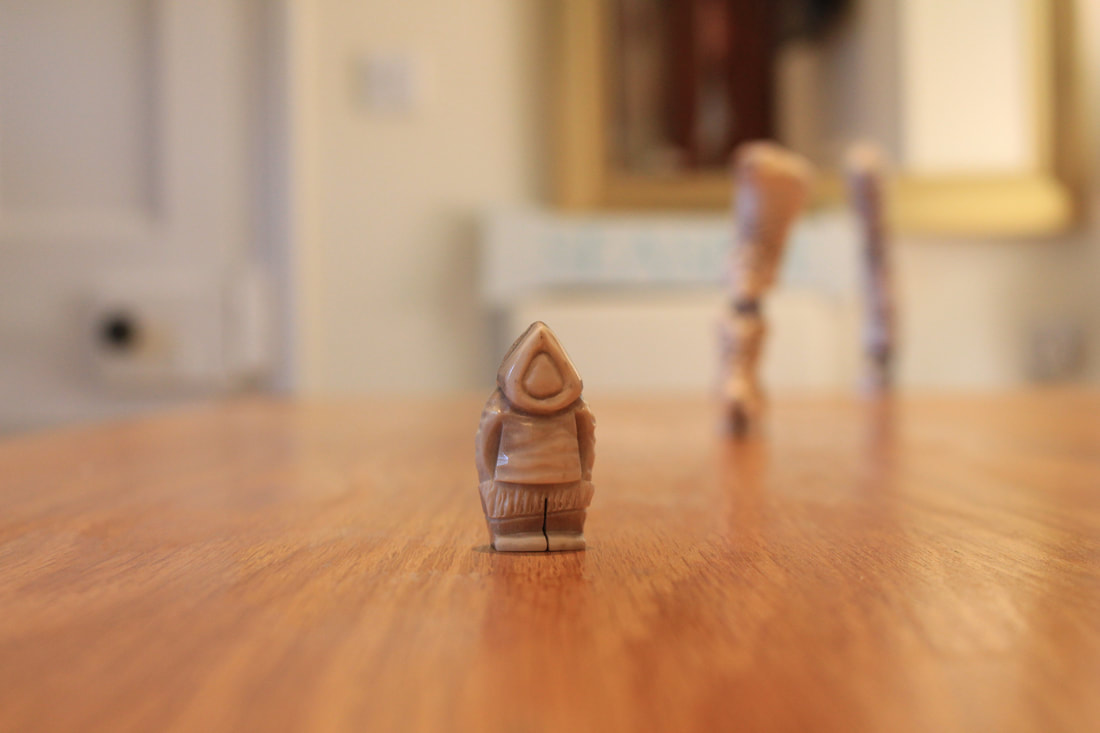
Review of Experiment 1
On reviewing this first round of photos, I realised that there was not sufficient distance between the three tupilaks for the changes in depth of field to be apparent.
On reviewing this first round of photos, I realised that there was not sufficient distance between the three tupilaks for the changes in depth of field to be apparent.
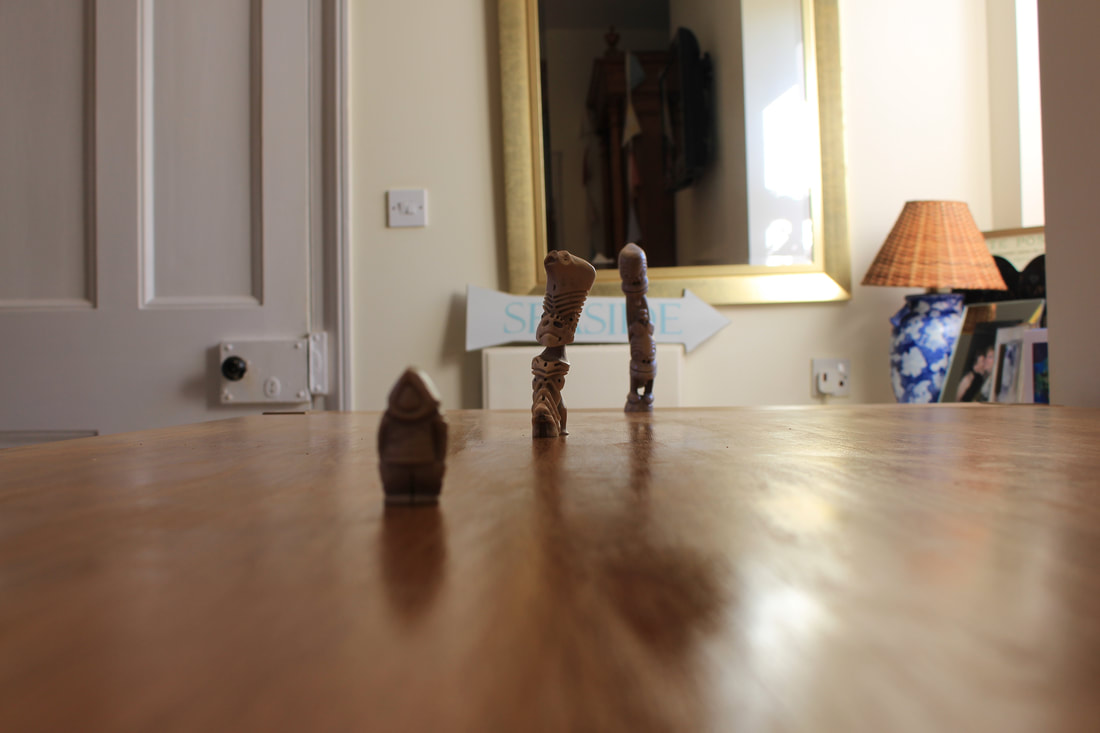
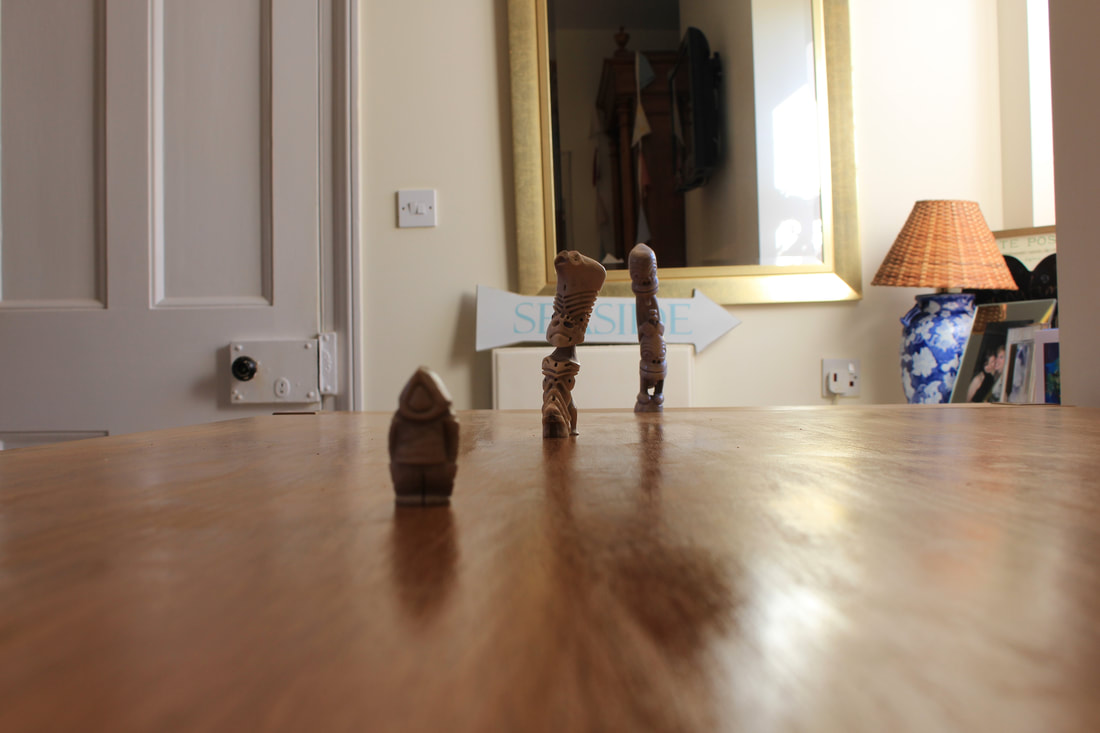
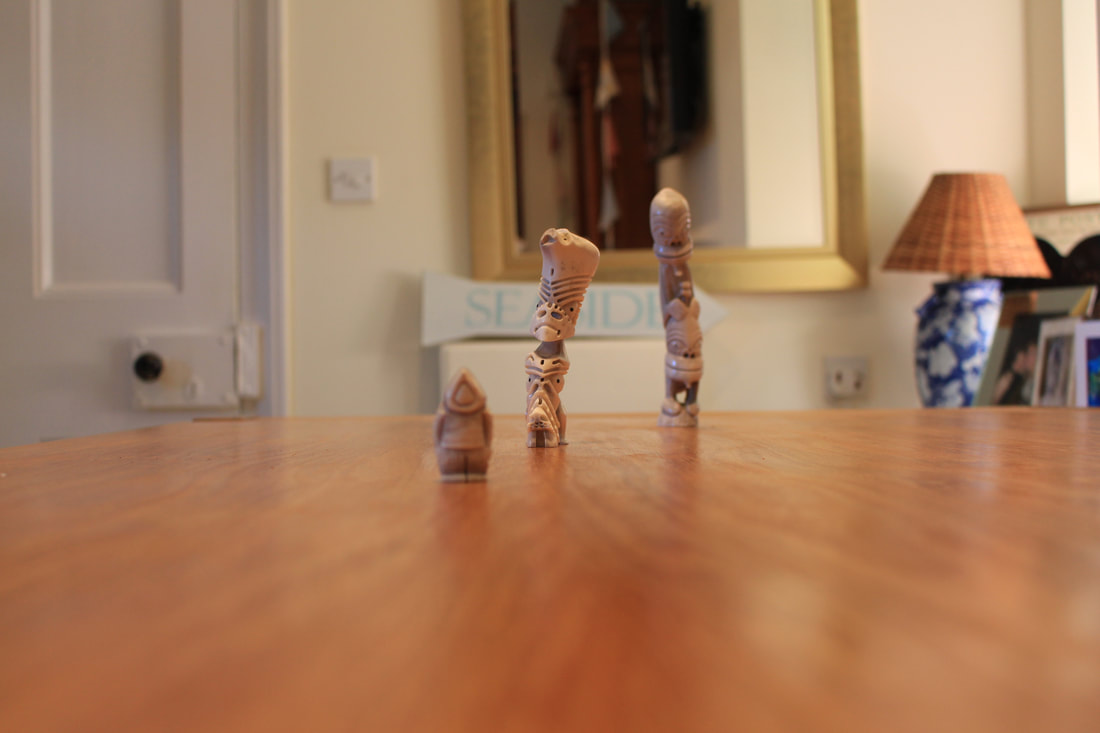
Experiment 2
|
f stop: f/4
Exposure: 1/30 ISO: 125 Focal length: 24 |

|
f stop: f/5.6
Exposure: 1/40 ISO: 320 Focal length: 24 |
|
f stop: f/8
Exposure: 1/40 ISO: 640 Focal length: 24 |
|
f stop: f/11
Exposure: 1/40 ISO: 1250 Focal length: 24 |

|
f stop: f/16
Exposure: 1/40 ISO: 2500 Focal length: 24 |
|
f stop: f/22
Exposure: 1/40 ISO: 5000 Focal length: 24 |
Review of Experiment 2
The extra distance between the tupilaks showed the difference in the depth of field settings better. I decided to increase the distance between each for the next experiment
The extra distance between the tupilaks showed the difference in the depth of field settings better. I decided to increase the distance between each for the next experiment
Experiment 3

|
f stop: f/4
Exposure: 1/80 ISO: 100 Focal length: 24 |
|
f stop: f/5.6
Exposure: 1/50 ISO: 100 Focal length: 24 |
|
f stop: f/8
Exposure: 1/30 ISO: 160 Focal length: 24 |
|
f stop: f/11
Exposure: 1/40 ISO: 320 Focal length: 24 |
|
f stop: f/16
Exposure: 1/40 ISO: 640 Focal length: 24 |

|
f stop: f/22
Exposure: 1/40 ISO: 1250 Focal length: 24 |
Review of Experiment 3
The extra distance between the tupilaks again effectively showed the difference between the different aperture settings. Alas the light coming through the window meant that the tupilaks were underexposed.
The extra distance between the tupilaks again effectively showed the difference between the different aperture settings. Alas the light coming through the window meant that the tupilaks were underexposed.
Experiment 4
|
f stop: f/5.6
Exposure: 1/80 ISO: 200 Focal length: 55 |
|
f stop: f/8
Exposure: 1/100 ISO: 400 Focal length: 55 |
|
f stop: f/11
Exposure: 1/100 ISO: 800 Focal length: 55 |
|
f stop: f/16
Exposure: 1/100 ISO: 1600 Focal length: 55 |
|
f stop: f/22
Exposure: 1/100 ISO: 3200 Focal length: 55 |
Review of Experiment 4
Again under exposed due to the window in the background. The first tupilak was bought closer to the camera. The first and last are never bought fully into focus, the distances between are too great, however they do sharpen as the aperture decreases.
Again under exposed due to the window in the background. The first tupilak was bought closer to the camera. The first and last are never bought fully into focus, the distances between are too great, however they do sharpen as the aperture decreases.
Experiment 5
|
f stop: f/4
Exposure: 1/50 ISO: 400 Focal length: 29 |
|
f stop: f/5.6
Exposure: 1/50 ISO: 800 Focal length: 55 |
|
f stop: f/8
Exposure: 1/50 ISO: 1600 Focal length: 55 |

|
f stop: f/11
Exposure: 1/50 ISO: 3200 Focal length: 55 |
|
f stop: f/16
Exposure: 1/50 ISO: 6400 Focal length: 55 |
|
f stop: f/22
Exposure: 1/25 ISO: 6400 Focal length: 55 |
Review of Experiment 5
What a difference a blind makes! The exposure and tonal colour is drastically improved. There is not much difference in clarity from f/11 onwards, the maximum depth of field appears to have been reached.
What a difference a blind makes! The exposure and tonal colour is drastically improved. There is not much difference in clarity from f/11 onwards, the maximum depth of field appears to have been reached.
Experiment 6
|
f stop: f/4
Exposure: 1/40 ISO: 400 Focal length: 29 |
|
f stop: f/5.6
Exposure: 1/50 ISO: 800 Focal length: 29 |
|
f stop: f/8
Exposure: 1/50 ISO: 1600 Focal length: 29 |

|
f stop: f/11
Exposure: 1/50 ISO: 3200 Focal length: 29 |

|
f stop: f/16
Exposure: 1/50 ISO: 6400 Focal length: 29 |
|
f stop: f/22
Exposure: 1/25 ISO: 6400 Focal length: 29 |
Review of Experiment 6
Again after f/11 there is not any increase in depth of field.
Again after f/11 there is not any increase in depth of field.
Experiment 7

|
f stop: f/4
Exposure: 1/50 ISO: 400 Focal length: 29 |

|
f stop: f/5.6
Exposure: 1/50 ISO: 800 Focal length: 29 |
|
f stop: f/8
Exposure: 1/50 ISO: 1600 Focal length: 29 |

|
f stop: f/11
Exposure: 1/50 ISO: 3200 Focal length: 29 |
|
f stop: f/16
Exposure: 1/50 ISO: 6400 Focal length: 29 |
|
f stop: f/22
Exposure: 1/25 ISO: 6400 Focal length: 29 |
Review of Experiment 7
These photos nicely and clearly show the increased depth of field with the increase in f stop.
These photos nicely and clearly show the increased depth of field with the increase in f stop.
Experiment 8 - the final one!
|
f stop: f/5.6
Exposure: 1/50 ISO: 1000 Focal length: 39 |
|
f stop: f/8
Exposure: 1/60 ISO: 2000 Focal length: 39 |
|
f stop: f/11
Exposure: 1/50 ISO: 4000 Focal length: 39 |

|
f stop: f/16
Exposure: 1/40 ISO: 6400 Focal length: 39 |

|
f stop: f/22
Exposure: 1/20 ISO: 6400 Focal length: 39 |
|
f stop: f/32
Exposure: 1/13 ISO: 6400 Focal length: 39 |
Review of Experiment 8
For all the other experiments I used the middle tupilak as the focal point. For this experiment I used the first tupilak as the focal point. Interesting I was able to take a photo at a smaller aperture (f/32) than I was in any of the other experiments.
For all the other experiments I used the middle tupilak as the focal point. For this experiment I used the first tupilak as the focal point. Interesting I was able to take a photo at a smaller aperture (f/32) than I was in any of the other experiments.
Review of all experiments
I am very glad I took the time to do this. Whilst it could appear a bit of an exercise in groundhog photo taking, it was interesting to see the nuances a few centimetres, a blind and a change in focal point could cause. I feel that I understand what the difference in f stop means when I take a photo. I will have to experiment a lot more when taking photos in situ, however I know the parameters I am working within and what is achievable.
Whilst channelling my inner Betchley Park code breaker earnestly recording the data from each photo in my notebook, it clearly showed me the link between aperture and ISO, invariably the smaller the f stop the higher the ISO and once the ISO was maxed at 6400, the exposure would then reduce.
Woodpecker
I was aware that none of the above really fulfils the brief of this exercise, therefore I took the following:
I was aware that none of the above really fulfils the brief of this exercise, therefore I took the following:
Review
Similar to the Viewpoint exercise I was unable to find a good setting/location in which I could take the photos necessary to fulfil this exercise. I acknowledge that this is likely due to my not thinking completely outside the box and being blinkered by the examples presented. I want to come back and revisit.
Similar to the Viewpoint exercise I was unable to find a good setting/location in which I could take the photos necessary to fulfil this exercise. I acknowledge that this is likely due to my not thinking completely outside the box and being blinkered by the examples presented. I want to come back and revisit.
